

Installing Reflective Insulation Film Under Underfloor Heating: Step-by-Step
Getting reflective insulation film installed correctly under your underfloor heating system is the single biggest factor in how well the setup performs once the screed goes down. Done right, nearly all the radiant heat bounces upward into the room. Done badly, a surprising amount of warmth gets absorbed by the subfloor instead. This guide walks through the entire process from bare concrete or timber base to the moment your heating pipes or modules are clipped into position.
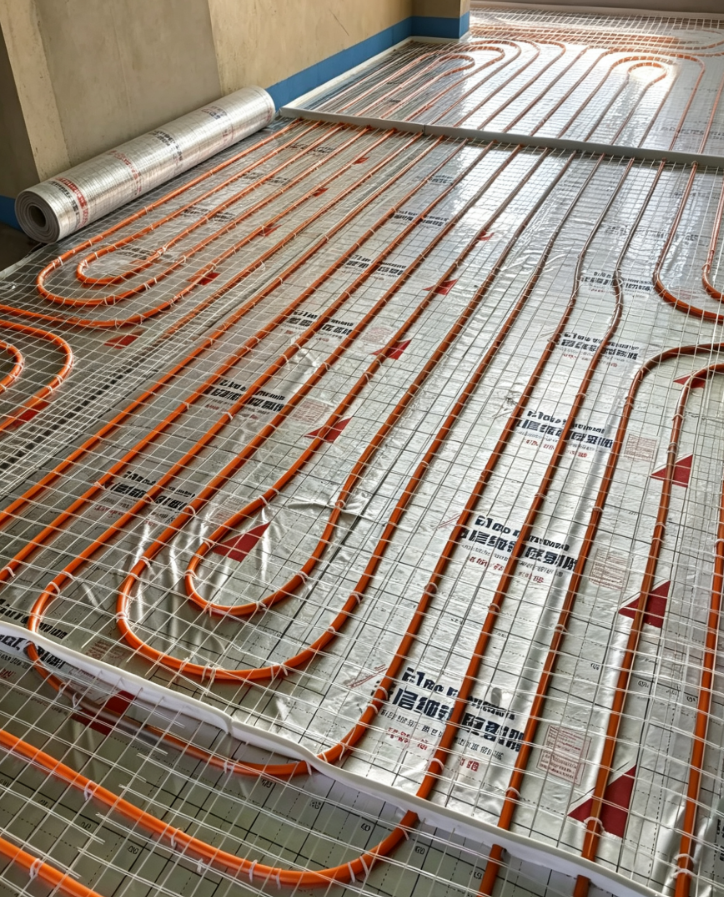
Start With a Clean, Dry Subfloor
Sweep the entire area thoroughly. Any grit, dust, or debris left under the film becomes a point where heat accumulates and can cause hot spots over time. A vacuum pass after sweeping is money well spent — especially on renovation sites where plaster dust settles into every corner. Check the moisture content of a concrete slab with a hygrometer before you proceed. Most manufacturers recommend the slab be below 2% moisture content by weight. If yours reads higher, wait. Rushing this step is the root cause of a surprising number of post-installation problems. Any surface irregularities or small cracks in concrete should also be filled and levelled in advance — the film needs a reasonably even surface to lay flat without bridging low spots.
Laying Direction and Sheet Alignment
Roll the film out in the same direction across the entire floor area. Mixing directions creates irregular overlaps and gaps that are difficult to seal properly. Most installers run the roll perpendicular to the direction of the heating pipes — this means the seams run parallel to the pipe runs, which makes overlapping and taping much cleaner. Unroll the sheets and allow them to rest for at least 30 minutes before fixing. Reflective films can develop a slight curl at the edges after being tightly wound in the factory; letting them flatten out prevents you from fighting the material as you tape. On large floor areas, chalk a straight reference line along one wall before you start — it keeps the whole layout honest and avoids a cascading drift across the room.
Overlapping the Seams Correctly
Standard practice is a 50–100 mm overlap along every seam. Reflective insulation films from reputable factories are often printed with an overlap guide on one edge to take the guesswork out. The reflective surface — the bright aluminum side — must face upward throughout the heated side of the assembly. On the non-reflective (usually black or white) side, the overlap can be tucked under without consequence. Never fold a sheet back on itself to fill a gap; cut a separate piece to size instead. Most field callbacks about uneven heat distribution trace back to a seam that was overlapped in the wrong direction — the upper sheet should shed water and dust toward the lower sheet, not the reverse.
Taping Joints and Edges
Use a foil-faced butyl tape or a purpose-made reflective insulation tape for all joints and perimeter edges. Standard duct tape will not hold long-term — the adhesive degrades under sustained warmth, and the seam will eventually open up. Press the tape firmly across the full seam width, working from one end to the other to avoid trapping air bubbles. At wall perimeters, tape the edge film to a depth of at least 50 mm. A well-taped floor can be walked on for weeks without the seams lifting, which matters when multiple trades are on site.
Maintaining the Required Air Space
Reflective insulation works by reflecting infrared radiation, and it needs an air gap to do that effectively. The minimum recommended gap between the top of the reflective film and the underside of the heating pipes or modules is 20 mm. Some manufacturers specify 30 mm for higher-output systems. Avoid compressing the film with excessive foot traffic or by stacking materials on top of it. A layer of loose-laid insulation board or a thin protective fleece over the film before the heating grid goes down is a sensible precaution on busy sites.
Fixing Pipes and Modules Over the Film
Clip the heating pipe or attach the heating panel directly to the subfloor through the film using the manufacturer's recommended fixings. Pre-drill through the film if you are using mechanical clips — a 6 mm hole will not significantly compromise the insulation performance. Avoid using solvent-based adhesives directly on the reflective surface, as some solvents attack the aluminum coating. Pipe staples or clips spaced at 150–200 mm intervals keep the pipe run secure and prevent it from floating when the screed is poured.
Tools and Safety Essentials
Keep a sharp utility knife with snap-off blades on hand — a dull blade tears the film rather than cutting it, leaving frayed edges that are hard to tape. A tape measure, a straightedge or spirit level, and a hand roller for pressing tape down are the core tools. Wear gloves when handling the foil-faced side continuously; the aluminum surface can cause mild irritation on bare skin after extended contact. If the film has a metallized coating rather than solid foil, it is generally more flexible and less abrasive.
References
ASTM International. (2022). ASTM C1224-22: Standard Specification for Reflective Insulation for Building Applications. ASTM International.
Reflective Insulation Manufacturers Association International. (2014). Understanding and Using Reflective Insulation, Radiant Barriers and Interior Radiation Control Coatings. RIMA-I.
U.S. Department of Energy. (2023). Radiant Barriers: Energy Saver Guide. Office of Energy Efficiency and Renewable Energy.
European Committee for Standardization. (2017). EN ISO 6946:2017: Building Components and Building Elements — Thermal Resistance and Thermal Transmittance — Calculation Methods. CEN.